Backups
Deno KV and related cloud primitive APIs like queues and cron are currently experimental and subject to change. While we do our best to ensure data durability, data loss is possible, especially around Deno updates.
Deno programs that use KV require the --unstable flag when launching the
program, as shown below:
deno run -A --unstable my_kv_code.ts
KV databases hosted on Deno Deploy can be continuously backed up to your own S3-compatible storage buckets. This is in addition to the replication and backups that we internally perform for all data stored in hosted Deno KV databases to ensure high availability and data durability.
This backup happens continuously with very little lag, enabling point-in-time-recovery and live replication. Enabling backup for KV databases unlocks various interesting use-cases:
- Retrieving a consistent snapshot of your data at any point in time in the past
- Running a read-only data replica independent of Deno Deploy
- Pushing data into your favorite data pipeline by piping mutations into streaming platforms and analytical databases like Kafka, BigQuery and ClickHouse
Configuring backup to Amazon S3
First you must create a bucket on AWS:
- AWS Console
- AWS CLI
- Go to the AWS S3 console
- Click "Create bucket"
- Enter a bucket name and choose a AWS region, then scroll down and click "Next"
- Install the AWS CLI
- Run
aws s3api create-bucket --bucket <bucket-name> --region <region> --create-bucket-configuration LocationConstraint=<region>(replace<bucket-name>and<region>with your own values)
Then, create an IAM policy with PutObject access to the bucket, attach it to
an IAM user, and create access keys for that user:
- AWS Console
- AWS CLI
- Go to the AWS IAM console
- Click "Policies" in the left sidebar
- Click on "Create policy"
- Select the "JSON" the policy editor and paste the following policy:
Replace
{
  "Version": "2012-10-17",
  "Statement": [
    {
      "Sid": "KVBackup",
      "Effect": "Allow",
      "Action": "s3:PutObject",
      "Resource": "arn:aws:s3:::<bucket-name>/*"
    }
  ]
}<bucket-name>with the name of the bucket you created earlier. - Click "Review policy"
- Enter a name for the policy and click "Create policy"
- Click "Users" in the left sidebar
- Click "Add user"
- Enter a name for the user and click "Next"
- Click "Attach policies directly"
- Search for the policy you created earlier and click the checkbox next to it
- Click "Next"
- Click "Create user"
- Click on the user you just created
- Click "Security credentials" and then "Create access key"
- Select "Other", then click "Next"
- Enter a description for the access key and click "Create access key"
- Copy the access key ID and secret access key and save them somewhere safe. You will need them later, and you will not be able to retrieve them again.
- Copy the following command to your terminal, and replace
<bucket-name>with the name of the bucket you created earlier, then run it:aws iam create-policy --policy-name <policy-name> --policy-document '{"Version":"2012-10-17","Statement":[{"Sid":"KVBackup","Effect":"Allow","Action":"s3:PutObject","Resource":"arn:aws:s3:::<bucket-name>/*"}]}' - Copy the following command to your terminal, and replace
<user-name>with a name for the user you are creating, then run it:aws iam create-user --user-name <user-name> - Copy the following command to your terminal, and replace
<policy-arn>with the ARN of the policy you created in step 1, and<user-name>with the name of the user you created in the previous step, then run it:aws iam attach-user-policy --policy-arn <policy-arn> --user-name <user-name> - Copy the following command to your terminal, and replace
<user-name>with the name of the user you created in step 2, then run it:aws iam create-access-key --user-name <user-name> - Copy the access key ID and secret access key and save them somewhere safe. You will need them later, and you will not be able to retrieve them again.
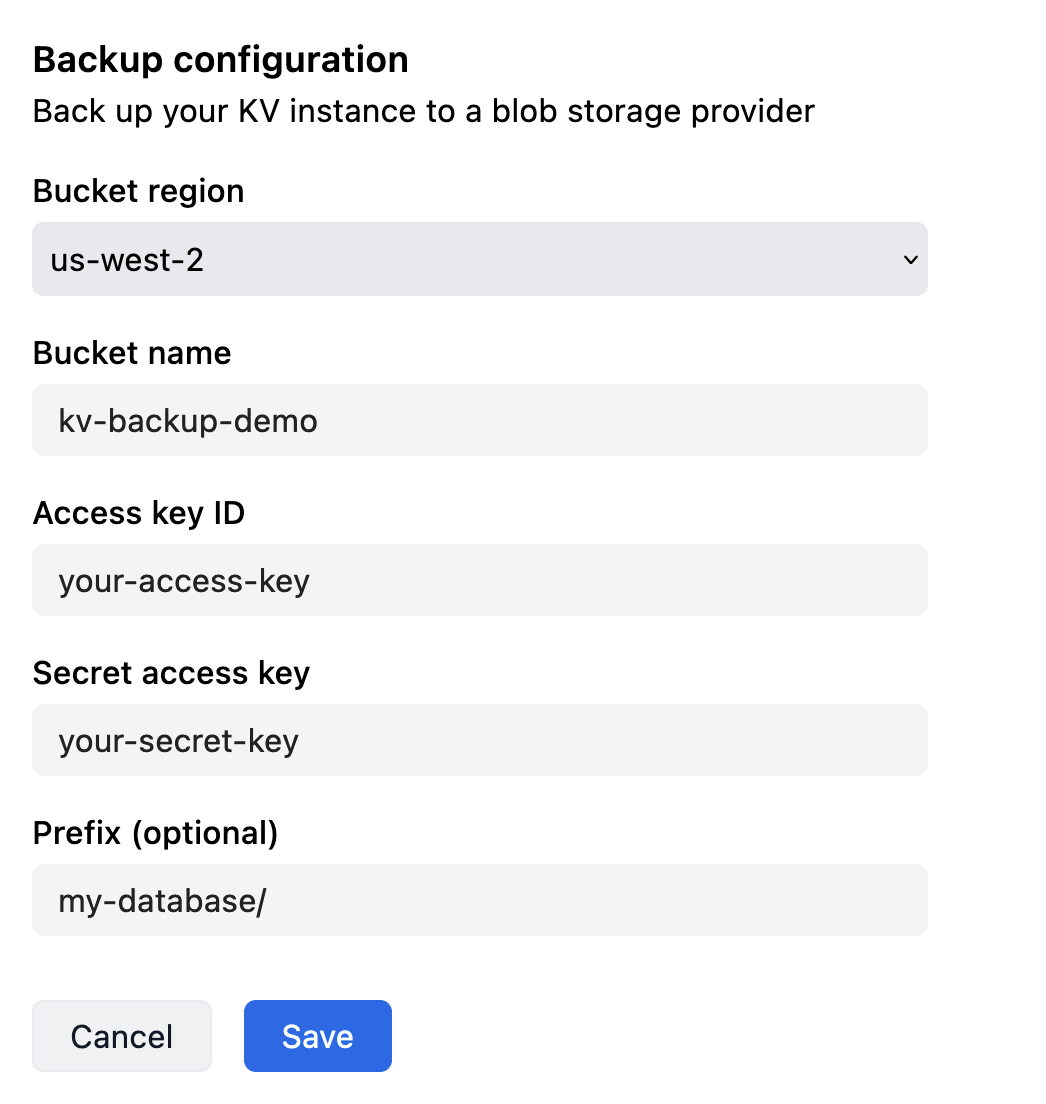
Now visit the Deno Deploy dashboard, and click on the "KV" tab in your project. Scroll to the "Backup" section, and click on "AWS S3". Enter the bucket name, access key ID, and secret access key you created earlier, and the region the bucket is in. Then click "Save".
The backup will start immediately. Once the data has been backed up, and continous backup is active, you will see the status change to "Active".
Configuring backup to Google Cloud Storage
Google Cloud Storage (GCS) is compatible with the S3 protocol, and can also be used as a backup target.
First you must create a bucket on GCP:
- GCP Console
- gcloud CLI
- Go to the GCP Cloud Storage console
- Click on "Create" in the top bar
- Enter a bucket name, choose a location, and click "Create"
- Install the gcloud CLI
- Run
gcloud storage buckets create <bucket-name> --location <location>(replace<bucket-name>and<location>with your own values)
Then, create a service account with Storage Object Admin access to the bucket,
and create an HMAC access key for the service account:
- GCP Console
- gcloud CLI
- Go to the GCP IAM console
- Click on "Service accounts" in the left sidebar
- Click on "Create service account"
- Enter a name for the service account and click "Done"
- Copy the email for the service account you just created. You will need it later.
- Go to the GCP Cloud Storage console
- Click on the bucket you created earlier
- Click on "Permissions" in the toolbar
- Click "Grant access"
- Paste the email for the service account you copied earlier into the "New principals" field
- Select "Storage Object Admin" from the "Select a role" dropdown
- Click "Save"
- Click on "Settings" in the left sidebar (still in the Cloud Storage console)
- Click on the "Interoperability" tab
- Click on "Create a key for a service account"
- Select the service account you created earlier
- Click "Create key"
- Copy the access key and secret access key and save them somewhere safe. You will need them later, and you will not be able to retrieve them again.
- Run the following command, replacing
<service-account-name>with a name for the service account you are creating:gcloud iam service-accounts create <service-account-name> - Run the following command, replacing
<bucket-name>with the name of the bucket you created earlier, and<service-account-email>with the email of the service account you created in the previous step:gsutil iam ch serviceAccount:<service-account-email>:objectAdmin gs://<bucket-name> - Run the following command, replacing
<service-account-email>with the email of the service account you created in the previous step:gcloud storage hmac create <service-account-email> - Copy the
accessIdandsecretand save them somewhere safe. You will need them later, and you will not be able to retrieve them again.
Now visit the Deno Deploy dashboard, and click on the "KV" tab in your project. Scroll to the "Backup" section, and click on "Google Cloud Storage". Enter the bucket name, access key ID, and secret access key you created earlier, and the region the bucket is in. Then click "Save".
The backup will start immediately. Once the data has been backed up, and continous backup is active, you will see the status change to "Active".
Using backups
S3 backups can be used with the denokv tool. Please refer to the
documentation for more details.